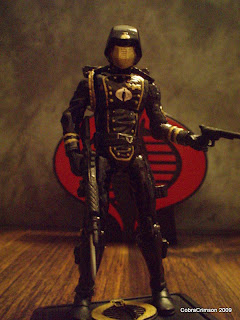
Wednesday, September 30, 2009


Commander Rex (Phase II Armor from Episode III)
I know this isn't a G.I.Joe custom, but I originally started customizing Star Wars figures before I started on the G.I.Joe stuff. I have liked Captain Rex since the first time I saw him with the Clone Wars movie and the Clone Wars animated cartoon on Cartoon Network. The 501st Legion seems to have a bunch of clone commander figures already with Commander Vill, Commander Bow & Commander Appo so I thought Captain Rex should be promoted to Commander Rex and I decided to do an Episode III version of him as a Commander in the 501st Legion in Phase II armor.
I started with Commander Vill figure from the 2008 Target exclusive Order 66 set and popped off his head. I painted the "Jaig" eyes on Vill's helmet too as well as painted the kilt black. Then I used a Captain Rex figure from 2008 The Clone Wars and used his head and blaster pistols as well as cut of his range finder off of his helmet. I glued the range finder onto the side of the Vill helmet and then put Rex's head on Vill's body and he was done. Not too much involved to make this one but it was fun and I liked the way it turned out.
Custom Commander Rex (Phase II armor from Episode III) "recipe"
Head - Captain Rex (2008 Star Wars : The Clone Wars single carded figure, Wave 1)
Range Finder - Captain Rex (2008 Star Wars : The Clone Wars single carded figure, Wave 1)
Blaster Pistols - Captain Rex (2008 Star Wars : The Clone Wars single carded figure, Wave 1)
Rest of Figure - Commander Vill (2008 Star Wars 30th Anniversary Target exclusive Order 66, Wave 2 {Emperor Palpatine & Commander Vill})
Paints used:
Tamiya X-1 (Gloss Black)
Testor's Model Master Gloss Blue

Tuesday, September 29, 2009


Cobra Armored Troop Transport
Here's the custom Cobra Armored Troop Transport vehicle that goes with yesterday's post for the custom driver figure. This custom vehicle started out as a tan colored L.A.V. from the BBI line of toys and after I completely stripped it appart and repainted it and added some stickers, this is what it now looks like in the above pics.
Before any paint was applied, I cut out the driver's hatch so the custom driver figure could sit or stand in there and cut the base of th eturret gunners slot out so a 25th Anniversary figure could actually stand in there right. I used flat black spray paint for the entire vehicle and added some flat blue on the ammo boxes, gloss black on the vents, mirrors, ammo boxes and stowage, flat red for the taillights, brown for the stowage and silver for details on stowage, mirrors, etc. The hardest part about getting this vehicle back together after the paint had dried was getting the rubber tires back on over the wheels! That part was not very fun at all but I managed without breaking anything or ruining the new paint job. After everything was put back together, stickers from cobrastickers.com were added for the finishing touch.
Custom Cobra Armored Troop Transport "recipe"
Entire vehicle - USMC L.A.V. (Light Armored Vehicle) (Elite Force 1:18 scale by BBI)
Paints used:
Flat Black Spray Paint
Tamiya X-1 (Gloss Black)
Tamiya XF-1 (Flat Black)
Tamiya XF-7 (Flat Red)
Tamiya X-11 (Chrome Silver)
Tamiya XF-8 (Flat Blue)
Tamiya XF-10 (Flat Brown)

Monday, September 28, 2009


Cobra Armored Troop Transport Driver
The G.I.Joe Team has the A.P.C. for a troop transport but Cobra really doesn't have anything like that so I decided to make them one that had some firepower on it and could haul some troops into battle. The vehicle I used for this custom was a L.A.V. from BBI and will be tomorrow's post. Today's post is for the custom driver that I made for it.
Starting with a "Scarface" Cobra Officer, I popped off his helmet, head & webgear. I wanted this driver to fit in with the rest of Cobra's "blueshirts" like the Stinger drivers and Officers and Troopers but yet, stand out a little from the pack. So I used Viper upper legs insted of the Cobra Officer ones and used a Snow Serpent head and goggles along with Double Clutch's vest. I popped the glued on goggles off of the Snow Serpent's head and then painted the head flat blue and the goggle red with black trim. After the paint had dried, the goggles were glued back on. The vest was originally dark green/olive drab and was repainted flat blue with black trim and the Viper upper legs were painted flat blue with black side pockets.
Once everything was put together, he looked like I had wanted him to, like a typical Cobra "Blueshirt", yet different enough to distinguish his rank and job classification.
Custom Cobra Armored Troop Transport Driver "recipe"
Head/goggles - Snow Serpent (2008 25th Anniversary single carded figure, Wave 9)
Vest - Double Clutch (2008 25th Anniversary Vehicle Sets, Wave 1 {Vamp w/Double Clutch})
Upper Legs - Viper (2008 25th Anniversary single carded figure, Wave 7)
Rest of figure - "Scarface" Cobra Officer (2008 25th Anniversary Comic Pack, Wave 3 {"Fred" Crimson Guard/"Scarface" Cobra Officer})
Paints used:
Tamiya X-1 (Gloss Black)
Tamiya XF-1 (Flat Black)
Tamiya XF-8 (Flat Blue)
Tamiya X-7 (Red)

Sunday, September 27, 2009


Cobra K-9 Unit Officer and Dog
Cobra needs a K-9 Unit to patrol the perimeter of their bases so I decided to make this special K-9 Unit Officer and his dog.
Starting with a 2007 25th Anniversary Cobra Officer from wave 1, I took his right upper leg and left lower arm off and switched them with 2008, wave 10 Mutt. The lower left arm from Mutt would not go into the Cobra Officer's left upper arm because the knob on Mutt's lower arm was bigger than the hole in the upper arm of the Officer. So, out came the dremel and with a little bit of modification, the Mutt lower arm fit into the Officer upper arm. I used Mutt's right upper leg with the holster and matched that up with the lower leg and torso of the Cobra Officer without a problem. The vest was also from Mutt and was repainted blue and black with some silver trim. I painted the K-9 Unit on the back of the vest and added a silver Cobra symbol from cobrastickers.com to the front and back of his vest.
For the Cobra dog, I painted a coat on him with blue and then added the black for the trim of the coat and put a silver Cobra symbol on both sides of the dog's coat to finish it.
Custom Cobra K-9 Unit Officer and dog "recipe"
Head/Helmet/Torso/Right Arm/Hand/Left Upper Arm/Left Leg/Foot/Right Lower Leg/Foot - Cobra Officer (2007 25th Anniversary single carded figure, Wave 1)
Left Lower Arm/Hand/Right Upper Leg/Vest/Gun and Accessories - Mutt (2008 25th Anniversary single carded figure, Wave 10)
Dog - Junkyard (2008 25th Anniversary single carded figure, Wave 10 {Mutt & Junkyard})
Paints used:
Tamiya X-1 (Gloss Black)
Tamiya X-11 (Chrome Silver)
Tamiya XF-1 (Flat Black)
Tamiya XF-8 (Flat Blue)

Friday, September 25, 2009


Cobra Viper Squad Leader/Officer
I wanted a special Viper to lead my Viper army so I decided to do a custom Squad Leader/Officer & a Viper Commander. These were both fairl easy custom figures to do since there was very little painting involved.
For the Viper Squad Leader/Officer, I started with a regular 25th Anniversary Cobra Viper figure and added some gold paint to his faceshield, vest buckles, belt buckle, knee pads, goggles and tips of his boots along with black gloves and arm pads. I painted over the small red Cobra symbol on his vest and placed a silver Cobra symbol sticker from cobrastickers.com in place of it.
As far as his rifle goes, it was replaced with a bigger and better one from Marauder's Gun Runners complete with scope and grenade launcher.
Custom Cobra Viper Squad Leader/Officer "recipe"
Complete figure - Viper (2008 25th Anniversary single carded figure, Wave 7)
Rifle - Marauder's Gun Runners
Paints used:
Tamiya XF-1 (Flat Black)
Tamiya X-12 (Gold Leaf)

Thursday, September 24, 2009


Cobra Black Widow Attack Jeep


Before Hasbro released the 25th Anniversary Cobra Stinger in the wave 5 of the vehicle sets mid-2009, I decided to give Cobra another attack jeep based on the 1982 Canadian Sears exclusive Cobra Combat M.S.V. set with a repainted black G.I.Joe Vamp and M.M.S. also repainted black.
I used a 25th Anniversary G.I.Joe Vamp jeep and took it completely appart and spray painted the body flat black. I brush-painted the wheels, gas cans, push bar and duffle bag on the hood. Stickers came from cobrastickers.com and I decided to call them Black Widows.
Custom Cobra Black Widow Attack Jeep "recipe"
Entire Jeep - G.I.Joe Vamp (2008 25th Anniversary Vehicle Sets, Wave 1)
Paints used:
Flat Black Spraypaint
Tamiya X-1 (Black)
Tamiya XF-1 (Flat Black)
Tamiya X-11 (Chrome Silver)
Tamiya XF-10 (Flat Brown)

Wednesday, September 23, 2009


Cobra Haz - T.A.T. (Hazardous - Tactical Assault Team) Officer continued..................
For the body armor, I used the chest and shoulder armor pieces from a 30th Anniversary Star Wars Clone Troop in training fatigues figure from 2007. I painted them flat black and then used a tiny drill bit and drilled the holes in them for simulated bullet holes and let the drill bit kind of hit the shoulder pieces to simulate battle damage scratches. Then after the holes were drilled, I painted the inside of the hole with flat black and then did the surrounding area around the holes in silver to simulate the armor breaking open and penetrated. The air breather mask is made from a 30th Anniversary Star Wars Clone Trooper Commander Vill helmet from the 2008 Target exclusive Order 66 set. I cut the lower section of the helmet out and painted it satin black with the red details and used rubber "tubes" from a screen window seal/gasket kit. I cut the rubber hoses to the desired length and glued them onto the mask. Then, glued the mask onto the troopers face. Once I put the rest of the figure back together, I glued the other ends of the hoses to the top of the body armor on the back where the ledge is after I dremeled out 2 small holes for them to go into. Using an Xacto knive, I sliced off the gun and holster on Tomax's right thigh and glued the holster from a H.I.S.S. driver's right thigh on inplace of it and put the gun in it. Then, I added a flesh wound on his right arm by using the dremel and taking a little bit of plastic off of his arm. Painted the new wound flesh color and then added the red for blood around the wound and down his leg and boots and on the stand too.
Custom Cobra Haz - T.A.T. (Hazardous - Tactical Assault Team) Officer "recipe"
Head, Helmet, Torso, Arms/Hands, Lower Legs - Night Watch Officer (2008 25th Anniversary Toys 'R Us exclusive Night Watch 5-pack set)
Upper Legs - Tomax (2008 25th Anniversary Comic Pack, Wave 3 {Tomax/Xamot})
Body Armor/Shoulder Armor - Clone Trooper in Training Fatigues (Episode II Style) (2007 30th Anniversary Star Wars single carded figures)
Air Breather Mask - Commander Vill helmet (2008 30th Anniversary Star Wars Target exclusive Order 66 set {Emperor & Commander Vill})
Hoses for Air Breather Mask - Rubber screen window gasket/seal repair kit (Menards, Home Depot, Lowes, etc.)
Large Rifle with Scope and Silencer - Marauder's Gun Runners
Uzi - Snake Eyes (2007 25th Anniversary G.I.Joe Box Set)
Silencer for Uzi - Marauder's Gun Runners
Grenades on belt - Viper (2008 25th Anniversary single carded figures, Wave 7)
Leg Holster and Gun - H.I.S.S. Driver (2008 25th Anniversary single carded figures, Wave 7)
Paints used:
Flat black Spray Paint
Tamiya X-1 (Gloss Black)
Tamiya X-7 (Red)
Tamiya X-11 (Chrome Silver)
Tamiya XF-19 (Sky Grey)
Tamiya XF-15 (Flat Flesh)

Tuesday, September 22, 2009


Cobra Haz - T.A.T. (Hazardous - Tactical Assault Team) Officer


This next custom figure I did was never a real figure or character made by Hasbro or in any of the comics or cartoons. He was something that I came up with and is a completely new character based on my idea. Cobra needed an elite tactical assault team that would go into any hazardous situation and get the job done. I wanted this Officer to have some battle damage too and have the gear needed for pretty much any hostile assault situation they could encounter. He is loaded with grenades, a handgun for close-quarters combat, an uzi, a large rifle with scope, an air-filtration mask and body armor. The body armor these elite soldiers wear is light weight and moves very well with them, yet is very strong and can withstand multiple close-range rounds as well as most machine gun fire from a distance.

I started with a Cobra Night Watch Officer and swapped his upper legs for a pair of Tomax upper legs with the Cobra style armor pads on the front of them. The upper and lower legs, along with the "pants" part of the lower torso were painted black and then reattatched to the rest of the torso after they had dried.


Continued in tomorrow's post................................

Monday, September 21, 2009


Cobra Arctic H.I.S.S. Tank continued....................
I started this custom with a 25th Anniversary Target exclusive blue H.I.S.S. Tank. I started by taking this H.I.S.S. Tank completely appart and spray-painted the body pieces with flat white. Then drew the desired camo patterns with pencil and painted them with light grey and then small blotches of dark grey. The canopy was painted black along with the troop carrier ledge on the back. The sides of the tank threads were brush painted with white and then the camo pattern was added over that. Stickers are a combination of the original stickers from a black H.I.S.S. Tank and cobrastickers.com red Cobra symbols and red H.I.S.S. numbers.
Custom Cobra Arctic H.I.S.S. Tank "recipe"
Complete H.I.S.S. Tank - H.I.S.S. Tank (2008 25th Anniversary Target exclusive H.I.S.S. Tank(blue) from Attack on Cobra Island set of 3 vehicles)
Paints used:
Flat White Spray Paint
Tamiya XF-1 (Flat Black)
Tamiya X-12 (Gold Leaf)
Tamiya X-11 (Chrome Silver)
Tamiya XF-66 (Light Grey)
Tamiya XF-63 (German Grey)
Tamiya X-2 (White)

Sunday, September 20, 2009


Cobra Arctic H.I.S.S. Tank with Arctic H.I.S.S. Commander


This next custom was done before Hasbro released the 25th Anniversary Arctic H.I.S.S. Tank set. I wanted to give the H.I.S.S. Commander figure a more H.I.S.S. Driver look by giving him the H.I.S.S. Driver trademark lower legs. I did some research on arctic vehicle camo patterns and decided to use this style on the H.I.S.S. Tank.

Today's post will pertain to the Arctic H.I.S.S. Commander figure, tomorrow's will be for the Arctic H.I.S.S. Tank.

Starting with a 25th Anniversary Snow Serpent, I used a H.I.S.S. Driver head and lower legs along with Snake Eyes webgear. I painted the "fur" parts of the Snow Serpent brown and black gloves. The head was painted white and received a sky blue mask like most of Cobra's Arctic Officers have. Painted the raised details on the H.I.S.S. Driver's helmet grey and the goggles silver.


Custom Cobra Arctic H.I.S.S. Commander "recipe"

Head - H.I.S.S. Driver (2008 25th Anniversary single carded figures, Wave 7)
Torso/Arms/Hands/Upper Legs - Snow Serpent (2008 25th Anniversary single carded figures, Wave 9)
Lower Legs - H.I.S.S. Driver (2008 25th Anniversary single carded figures, Wave 7)
Webgear - Snake Eyes (2007 25th Anniversary G.I.Joe Box Set)
AK47 - Snow Serpent (2008 25th Anniversary single carded figures, Wave 9)


Paints used:
Tamiya X-11 (Chrome Silver)
Tamiya XF-66 (Light Grey)
Tamiya XF-1 (Flat Black)
Tamiya XF-10 (Flat Brown)
Tamiya X-14 (Sky Blue)
Tamiya X-2 (White)

Saturday, September 19, 2009


Cobra "Slither" A.T.V.


I wanted to give Cobra something they could use as far as an A.T.V. that was smaller and more "life-like" sized than the classic Cobra Ferret. I saw these A.T.V.s on Marauder's Gun Runners site and bought 2 of them. They come cast in a dark green color so I took them both appart and painted pretty much everything a different color than what it originally was. The main body piece was painted blue with black camo patterns on it and the engine and suspension was detailed a little bit too. After the paint was dry, I re-assembled the entire vehicle and put some stickers on from leftover Cobra F.A.N.G.s. These 4-wheelers are a pretty close to life size vehicle for these 25th Anniversary G.I.Joe and Cobra figures and with the color scheme I used, they look good with Cobra's Night Watch figures from the Toys 'R Us exclusive 5-pack set.


Custom Cobra "Slither" A.T.V. "recipe"


Complete 4 wheeler - Marauder's Gun Runners


Paints used:

Testor's Model Master Gloss Blue

Tamiya X-1 (Gloss Black)

Tamiya X-11 (Chrome Silver)

Friday, September 18, 2009


Tomax and Xamot Extensive Enterprises business suits continued.........


........I painted the pants flat grey and the jackets flat blue. The 6 buttons on their jackets where painted gold, the shirts underneath their jackets were painted white with yellow ties. Then to complete their business attire, I got 2 conceal-carry briefcases from Marauder's Gun Runners and a set of Extensive Enterprises logo stickers from cobrastickers.com.


Custom Tomax and Xamot in Extensive Enterprises business suits "recipe"


Heads - Tomax and Xamot (2008 25th Anniversary Comic Pack, Wave 3 {Tomax/Xamot})

Rest of figures - Cobra Commander {Black Suit} (2008 25th Anniversary SDCC Exclusive Black Suit)

Briefcases - Marauder's Gun Runners (Conceal-Carry cases)


Paints used:

Tamiya X-12 (Gold Leaf)

Tamiya XF-8 (Flat Blue)

Tamiya XF-66 (Light Grey)

Tamiya X-7 (Lemon Yellow)

Tamiya X-8 (Red)

Thursday, September 17, 2009


Tomax and Xamot in their Extensive Enterprises Business Suits (Cobra Crimson Guard Commanders)
These have been the most expensive custom figures that I have done yet. I can't beleive that Hasbro has yet to release these two as a set in their Extensive Enterprises business suits like they wore in the Sunbow cartoon during the 1980's. This set would be a definate seller for them if they would ever do this, even if they were released as an exclusive set. After watching the old cartoons on DVD, I figured out what I was going to use to make these figures on my own. The expensive part is the 2 San Diego ComicCon (SDCC) exclusive Cobra Commander black suit figures that I had to buy to use as the basis for these figures. At $20-$25+ per figure, just to use for customs is kind of expensive but they turned out just how I had hoped they would. After the two SDCC Cobra Commanders arrived in the mail, I opened them up and popped off their heads. I noticed that the Tomax and Xamot heads from the comic pack would not fit on the neck ball of the SDCC CC figures because the neck balls were bigger than the holes in the bottom of the Tomax/Xamot heads. So a little dremel work on the insides of Tomax and Xamot's heads and they fit good. Tomax and Xamot are twin brothers who dress similar, only "mirror" each other's outfit. Notice the jacket, how the red button is on the left side on Tomax and on the right side on Xamot. They have always been like this since the first time they were in the cartoon and they also always had the opposites on their jacket with the overlaps with Tomax's going towards the right and Xamot's going towards the left. In order to get this, I had to carefully cut off the edge on one of the SDCC CC jackets and flip it over and glue it down so it overlapped the opposite way for Xamot.
Continued tomorrow..........................

Wednesday, September 16, 2009


Crimson Shadow Guard Officer


To lead the 4 custom Crimson Shadow Guard Troopers that I made, I decided to do a custom Officer. Using the "Fred" Crimson Guard from the comic packs, I painted him with Tamiya Gloss Black and Tamiya Gold Leaf acrylic paints. I painted the accents with the Gold Leaf insted of the Chrome Silver like on the Crimson Shadow Guard Troopers to signify his rank above them as an Officer.


Custom Crimson Shadow Guard Officer "recipe"

Complete Figure - "Fred" Crimson Guard (2008 25th Anniversary Comic Packs, Wave 3 {"Fred" Crimson Guard/"Scarface" Cobra Officer})
Rifle - Crimson Guard (2008 25th Anniversary single carded figure, Wave 5)

Paints Used:

Tamiya X-1 (Gloss Black)
Tamiya X-12 (Gold Leaf)

Tuesday, September 15, 2009


Female Crimson Shadow Guard Trooper continued.........


......Next, I used Tamiya Gloss Black (X-1) acrylic paint and painted the whole body, arms, legs, her hair, helmet and backpack. After the black dried, I used Tamiya Chrome Silver (X-11) for the accents on her chest and dual leg stripes down the outside thigh pieces and the emblem on her helmet. Then, I cut the shoulder pads off of the comic pack Crimson Guard "Fred" figure (that also donated the helmet, legs, backpack, rifle, pistol and stand) and glued them onto her shoulders.


Custom Female Crimson Shadow Guard Trooper "recipe"

Head - Scarlett (Pilot) (2008 25th Anniversary single carded figures, Wave 11)
Torso - Scarlett (Pilot) (2008 25th Anniversary single carded figures, Wave 11)
Arms/Hands - Scarlett (Pilot) (2008 25th Anniversary signle carded figures, Wave 11)
Legs/Feet - "Fred" Crimson Guard (2008 25th Anniversary Comic Pack, Wave 3 {"Fred" Crimson Guard/"Scarface" Cobra Officer})
Helmet - "Fred" Crimson Guard (2008 25th Anniversary Comic Pack, Wave 3 {"Fred" Crimson Guard/"Scarface" Cobra Officer})
Shoulder Pads - "Fred" Crimson Guard (2008 25th Anniversary Comic Pack, Wave 3 {"Fred" Crimson Guard/"Scarface" Cobra Officer})
Gear (Backpack, Rifle, Pistol & Stand) - "Fred" Crimson Guard (2008 25th Anniversary Comic Pack, Wave 3 {"Fred" Crimson Guard/"Scarface" Cobra Officer})


Paints Used:

Tamiya X-1 (Gloss Black)
Tamiya X-11 (Chrome Silver)

Monday, September 14, 2009


Female Crimson Shadow Guard Trooper
To go with the 3 previous Crimson Shadow Guard Troopers that I made, I decided to do a female version. Since Hasbro has never made a female Crimson Guard figure at all (Baroness Crimson Strike Team doesn't count either), I had to do some parts searching and came up with this combination seen in the above pictures. Using a dremel tool and a very very tiny bit of greenstuff (to fill in the hole left in the left upper chest/shoulder area from the grenade piece, and to smooth out the right shoulder area where I dremeled the "shoulder pad" off), parts from 2 very different 25th Anniversary figures and some gloss black and chrome silver Tamiya paints, the female Crimson Shadow Guard Trooper was created. I chose to use the 25th Anniversary Pilot Scarlett figure for the torso, arms, hands and head. The "stock" 25th Pilot Scarlett has alot more hair on her head than what this custom has and had to be dremelled and minor sculpting so the Crimson Guard helmet would fit on her head. I also had to dremel out the hip areas on the lower torso of the Pilot Scarlett figure to get the Crimson Guard upper legs to fit. After carefully dremelling out the hips, the Crimson Guard legs finally fit.
Getting the hair dremelled down enough so the helmet would fit over her head was a bit trickier then the hips were. After finally getting the head to fit in the helmet, it was on to the right shoulder pad on the Scarlett torso, I dremelled that off and filled in the hole left with greenstuff. After it dried, I smoothed it out and sanded it down so it looked normal. Continued tomorrow.................

Sunday, September 13, 2009


Rip-It (Cobra H.I.S.S. Tank Division General)


After seeing the Rip-It figure from the 2007 International G.I.Joe Convention (Atlanta, GA), I decided my Cobra army needed a H.I.S.S. Tank Division General and went with the 2007 version of Rip-It (black with blue accents), rather than the 2000 version which was blue with black accents. To give him a sense of higher rank and more importance than the H.I.S.S. Commanders or the H.I.S.S. Drivers, I gave this custom Rip-It a removeable helmet to go along with his different paintjob and different customized H.I.S.S. Command Tank #000. To get the desired removeable helmet, I had to use the head from the H.I.S.S. Commander that I used as the donor for this custom Rip-It and dremel out the inside of the head until it fit over the Scarface Cobra Officer head that was being used for him. I used gloss paints on this and now, wish that I had used flats insted due to the shine, but it sets him appart from the rest of the H.I.S.S. Commanders and Drivers. Everything on the H.I.S.S. Commander was repainted to acheive the desired colors.


Custom Rip-It "recipe"


Head - Scarface Cobra Officer (2008 25th Anniversary comic pack, Wave 3 {Fred Crimson Guard/Scarface Cobra Officer})

Helmet - H.I.S.S. Commander (2008 25th Anniversary vehicle packs, Wave 1 H.I.S.S. Tank)

The Rest of Figure - H.I.S.S. Commander (2008 25th Anniversary vehicle packs, Wave 1 H.I.S.S. Tank)


Paints Used:


Testor's Model Master Gloss Blue

Tamiya X-1 (Gloss Black)

Tamiya X-11 (Chrome Silver)

Tamiya X-7 (Red)

Saturday, September 12, 2009


Raptor continued...................


........Starting with the torso, I decided to use Gung-Ho from the 2007 25th Anniversary G.I.Joe Box Set. I pulled Gung-Ho's vest off and popped his head off. Unscrewed his legs and took them appart too. I needed an upper torso that featured a bare chest and arms so Gung-Ho was the best choice for this at the time and I had the parts available. First thing to do after taking appart Gung-Ho was to scratch off the Marine logo tattoo on his chest. I did this very carefully with the tip of an Xacto knife blade, this allowed me to get into the grooves of his chest and remove the tattoo. Now, I needed to put together a new set of legs that resembled the vintage Raptor figures legs from 1987. I used Roadblocks upper legs from the 2007 G.I.Joe Box Set and Gung-Ho's lower legs, also from the 2007 Box Set. To get the leg holster on his left thigh, I usde the one from Gung-Ho's right thigh and made some modifications to it with the Xacto knife so it looked right on his left thigh. Now to find a head that looked somewhat like Raptor's.........I used Duke's head, also from the 2007 G.I.Joe Box Set and painted the brown around his eyes like Raptor has. For the arms, I kept the Gung-Ho ones with the torso and painted the elbow pads and gloves black. After painting the lower torso pants part and the legs brown and the boots black with silver "talons" on the toes like the original Raptor had, I decided to try and make the Cobra necklace like the vintage version had. I used the dogtags off of the 2008 25th Anniversary single carded figure, Wave 8 Major Bludd and cut off some of the "chains", then used greenstuff to sculpt the "pendant" on the necklace. After the greenstuff dried and was sculpted a little bit, I painted the chains red and the pendant silver with black trim and back. Carefully cut the edges off of a red Cobra chest sticker from www.cobrastickers.com and placed it on the newly constructed pendant. After all of the figure was painted, dried and re-assembled, I got the idea to use real feathers insted of sculpting them on with greenstuff. After a trip to the local JoAnn fabrics store, I had the feathers I needed for the job. Using basically just the tips of the feathers, I glued them on his wrists, ankles and back with clear Loc-Tite glue. Also using the Loc-Tite glue, I glued the freashly painted belt buckle that was dremeled out of the original Raptor figure's waist onto the new Raptor waist. The backpack post had to be removed from the original Raptor's backpack/winged-cape and some of the plastic had to be cut off from the backpack part as well to fit the contours of the 25th Anniversary Gung-Ho back. Then, slipped the new Raptor's arms through the holes in the cape and glued the modified backpack piece onto his back. The last step was to glue the original cowl onto Duke's head. Before the cowl fit right, I had to carefully cut the tab out of the cowl that used to go into the groove on Raptor's head. To finish him off, I added some detail paint apps to his bird and made him a custom stand.


Custom Raptor "parts recipe"


Head - Duke (2007 25th Anniversary G.I.Joe Box Set)

Torso - Gung-Ho (2007 25th Anniversary G.I.Joe Box Set)

Arms - Gung-Ho (2007 25th Anniversary G.I.Joe Box Set)

Upper Legs - Roadblock (2007 25th Anniversary G.I.Joe Box Set)

Lower Legs - Gung-Ho (2007 25th Anniversary G.I.Joe Box Set)

Side Holster and Gun - Gung-Ho (2007 25th Anniversary G.I.Joe Box Set)

Cobra Pendant - Major Bludd (2008 25th Anniversary single carded figure, Wave 8)

Cowl - Raptor (1987 ARAH single carded figure)

Backpack with "wings" cape - Raptor (1987 ARAH single carded figure)

Belt Buckle - Raptor (1987 ARAH single carded figure)

Bird - Raptor (1987 ARAH single carded figure)


Paints used:

Tamiya X-9 (Brown)

Tamiya X-1 (Black)

Tamiya X-7 (Red)

Tamiya X-11 (Chrome Silver)

Friday, September 11, 2009


Raptor (Cobra's Bird Handeler)


Next up was one of my favorites still to this day, Raptor! I never really liked him when I was a kid but he always looked kind of cool and I figured Hasbro would not release him in the 25th style (which they have not, yet), so I'd try and make my own custom 25th style Raptor. I bought a vintage ARAH Raptor figure complete off of ebay and started looking through my custom fodder pieces to get an idea of what parts I was going to use to make him into a 25th Anniversary update. Once I found out what pieces I was going to use, I decided to get the feathers on his back, wrists and ankles like the vintage figure had sculpted on, I was going to use real feathers and glue them on. Starting with the vintage Raptor, I managed to pry the cowl off of his head(they are glued on originally from Hasbro) and take off his cape and bird. Then came the fun part, to get the belt buckle off of the figure! I used the dremel tool and hacked appart the vintage Raptor's waist piece and was careful not to damage the belt buckle area. After getting the buckle free from the remainder of his waist, I carefully trimmed around the buckle untill it had a nice even flat edge that I could glue onto the new Raptor's belt and trimmed the edges also. Now that I was done with stripping the vintage Raptor of everything I needed, it was on to the task of kit-bashing the parts together for the new one................................


To Be Continued in Tomorrows Post......................

Thursday, September 10, 2009


Cobra Crimson Strike Team Viper
Next up, I did a custom Crimson Strike Team Viper based on the JoeCon Crimson Strike Team set from 2002. I made this custom Viper a year before any news of the 2009 JoeCon Crimson Strike Team set was released. I started with a regular 25th Anniversary Wave 7 Cobra Viper and decided to make a removeable helmet for him too. First, I popped off the Viper head and then dremeled out the inside until it would fit over a 25th Anniversary Cobra "Scarface" Officer head from the comic pack. Next, I took off the Viper's vest and painted it black, red and silver with Tamiya acrylic paints and painted the Viper's body red also. I painted the Viper's wrist pads silver as well as the insides of his thigh pads. Then painted the helmet red and the goggles black with silver lens and red straps on the goggles, added a Crimson Strike Team logo in silver on his left bicep, painted the outside trim of his wrist pads and inner thigh pads black along with the pockets on the outside of his thighs.
Custom Cobra Crimson Strike Team Viper "recipe"
Head - "Scarface" Cobra Officer (2008 25th Anniversary Comic Pack, Wave 3 {"Fred" Crimson Guard/"Scarface" Cobra Officer})
Rest of figure - Viper (2008 25th Anniversary Single Carded Figure, Wave 7)
Paints Used:
Tamiya X-1 (Gloss Black)
Tamiya X-11 (Chrome Silver)
Tamiya X-7 (Red)

Wednesday, September 9, 2009


Cobra Crimson Shadow Guard Trooper


My next custom was a Crimson Shadow Guard Trooper. Based on the TRU exclusive Crimson Shadow Guard set from 2005. I liked the look of them and figured Hasbro would not release an updated version of them so I did my own. These were more than just a little paint here and there, they are complete repaints basically. I used Tamiya Gloss Black (X-1) on the first custom Crimson Shadow Gurads that I did (3 Troopers, 1 female Trooper and an Officer) but now use Satin and Flat Black on my newer ones. I used the "Fred" Crimson Guard from the 25th comic pack with the "Scarface" Cobra Officer for these first customs. The trim was painted with Tamiya Chrome Silver (X-11)


Custom Crimson Shadow Guard Trooper "recipe"

Entire Figure - Fred series Crimson Guard (2008 25th Anniversary Comic Pack, Wave 3 {"Fred" Crimson Guard/"Scarface" Cobra Officer})
Rifle - Crimson Guard (2008 25th Anniversary Single Carded Figure, Wave 5)


Paint used:
Tamiya X-1 (Gloss Black)
Tamiya X-11 (Chrome Silver)

Tuesday, September 8, 2009


Cobra Night Watch H.I.S.S. Tank Driver

My next custom G.I.Joe figure I did was a Cobra Night Watch H.I.S.S. Tank Driver. I based the colors and camo patterns off of the Toys 'R Us exclusive Cobra Night Watch 5-pack set with the black and blue camo. He was another example of just using a little bit of paint to make a different figure that most likely will never be produced otherwise.
I used Tamiya Flat Black (XF-1) and that was all the paint needed for this one. Painted his head, upper/lower torso, arms and upper legs.
Custom Cobra Night Watch H.I.S.S. Tank Driver "recipe"
Complete Figure(minus the Upper and Lower Legs) - H.I.S.S. Commander (2008 25th Anniversary H.I.S.S. Tank Vehicle Set, Wave 1)
Upper/Lower Legs - H.I.S.S. Driver (2008 25th Anniversary Single Carded Figures, Wave 7)
Paint Used:
Tamiya XF-1 (Flat Black)

Monday, September 7, 2009


Cobra Officer (Female)


Well, let's start where it all began for me. late 2007 I started customizing some of my Star Wars figures a little bit and then got into the G.I.Joe 25th Anniversary line and the rest is history as they say.


My fisrt G.I.Joe custom was a female Cobra Officer. I used a Scarlett figure from the 25th Anniversary G.I.Joe Box Set from 2007. Popped her hair off and cut off the small grenade attatched by her shoulder. Took off all of her gear that was supplied with her and scrounged up an extra blue Cobra Officer helmet from a 25th Anniversary Wave 1 Cobra Officer and an AK47 rifle from an extra 25th Anniversary comic pack "Scarface" Cobra Officer. These first customs I did only involved mionor dissasembly and parts swapping. Later on after more experience, I started to delve deeper into the custom possibilities.


I used Tamiya Flat Blue (XF-8) Acrylic Paint and Tamiya Flat Black (XF-1) Acrylic Paint for the colors to make her into a Cobra Officer. After a couple light coats of paint were applied and dried, the finishing touch was a red Cobra sigil sticker placed on her chest. To get the sticker to sit properly and adhear to the contours of her chest, I placed the sticker where I wanted it to be and used a hair dryer held a couple of inches above the sticker and figure to heatup the sticker and make it more plyable. The heat softened the sticker and allowed it to be smoothed out and form to the contours of her chest.


Custom female Cobra Officer "Recipe"

Head - Scarlett (2007 25th Anniversary G.I.Joe Box Set)
Upper/Lower Torso - Scarlett (2007 25th Anniversary G.I.Joe Box Set)
Upper/Lower Arms - Scarlett (2007 25th Anniversary G.I.Joe Box Set)
Hands - Scarlett (2007 25th Anniversary G.I.Joe Box Set)
Upper/Lower Legs - Scarlett (2007 25th Anniversary G.I.Joe Box Set)
Feet - Scarlett (2007 25th Anniversary G.I.Joe Box Set)
Helmet - Cobra Officer (2007 25th Anniversary Single Carded Wave 1)
Rifle - "Scarface" Cobra Officer (2008 25th Anniversary Comic Pack {Crimson Guard/Cobra Officer} Wave 3)

Paint:
Tamiya XF-1 (Flat Black)
Tamiya XF-8 (Flat Blue)